
Disclosure: this page may contain affiliate links, where I earn a commission (at no cost to you) if you decide to make a purchase. With that being said, I will only ever recommend products that I actually use and fully endorse.
An easy, hearty, and deeply flavorful loaf for busy bakers.
If you’ve ever wanted to make a beautiful, bakery-style whole wheat sourdough loaf—without the arm workout—this recipe’s for you. The secret? A no-knead method that relies on time, not muscle, to build structure and flavor.
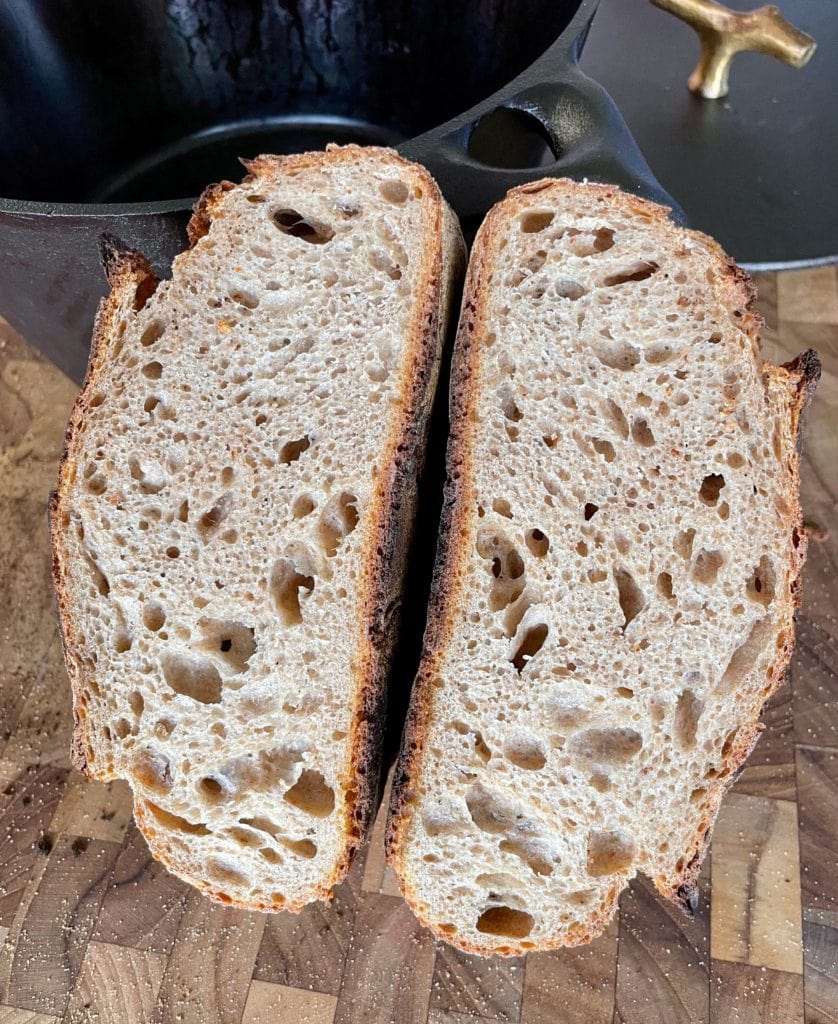
This bread is about as low-maintenance as sourdough gets: mix, rest, shape, bake. That’s it. You’ll end up with a golden, crackly crust, a soft and chewy interior, and the deep, nutty flavor that makes whole wheat bread taste like real food.
Why You’ll Love This Whole Wheat Sourdough Bread
This recipe takes inspiration from Jim Lahey’s legendary no-knead method (of Sullivan Street Bakery fame), but swaps in half whole wheat flour for more depth and nutrition. Yes, it takes a little patience—but the hands-on time is minimal, and the payoff is huge.
Whether you’re brand-new to sourdough or just short on time, this method fits right into a busy schedule. The dough does most of the work while you do… literally anything else.
And if your first loaf isn’t perfect? Welcome to the club. Sourdough is part science, part intuition, and a lot of practice—but once you find your rhythm, you’ll be baking better-than-bakery loaves without even changing out of your slippers.
What You’ll Need
Ingredients
- Active sourdough starter – Bubbly and recently fed. It should double within 12 hours of feeding and smell pleasantly tangy.
- Whole wheat flour – Adds flavor, color, and nutrients.
- Bread or all-purpose flour – Keeps the crumb light and open.
- Water – Cool or room temperature works best for a slow fermentation.
- Salt – Essential for structure and flavor.
Equipment
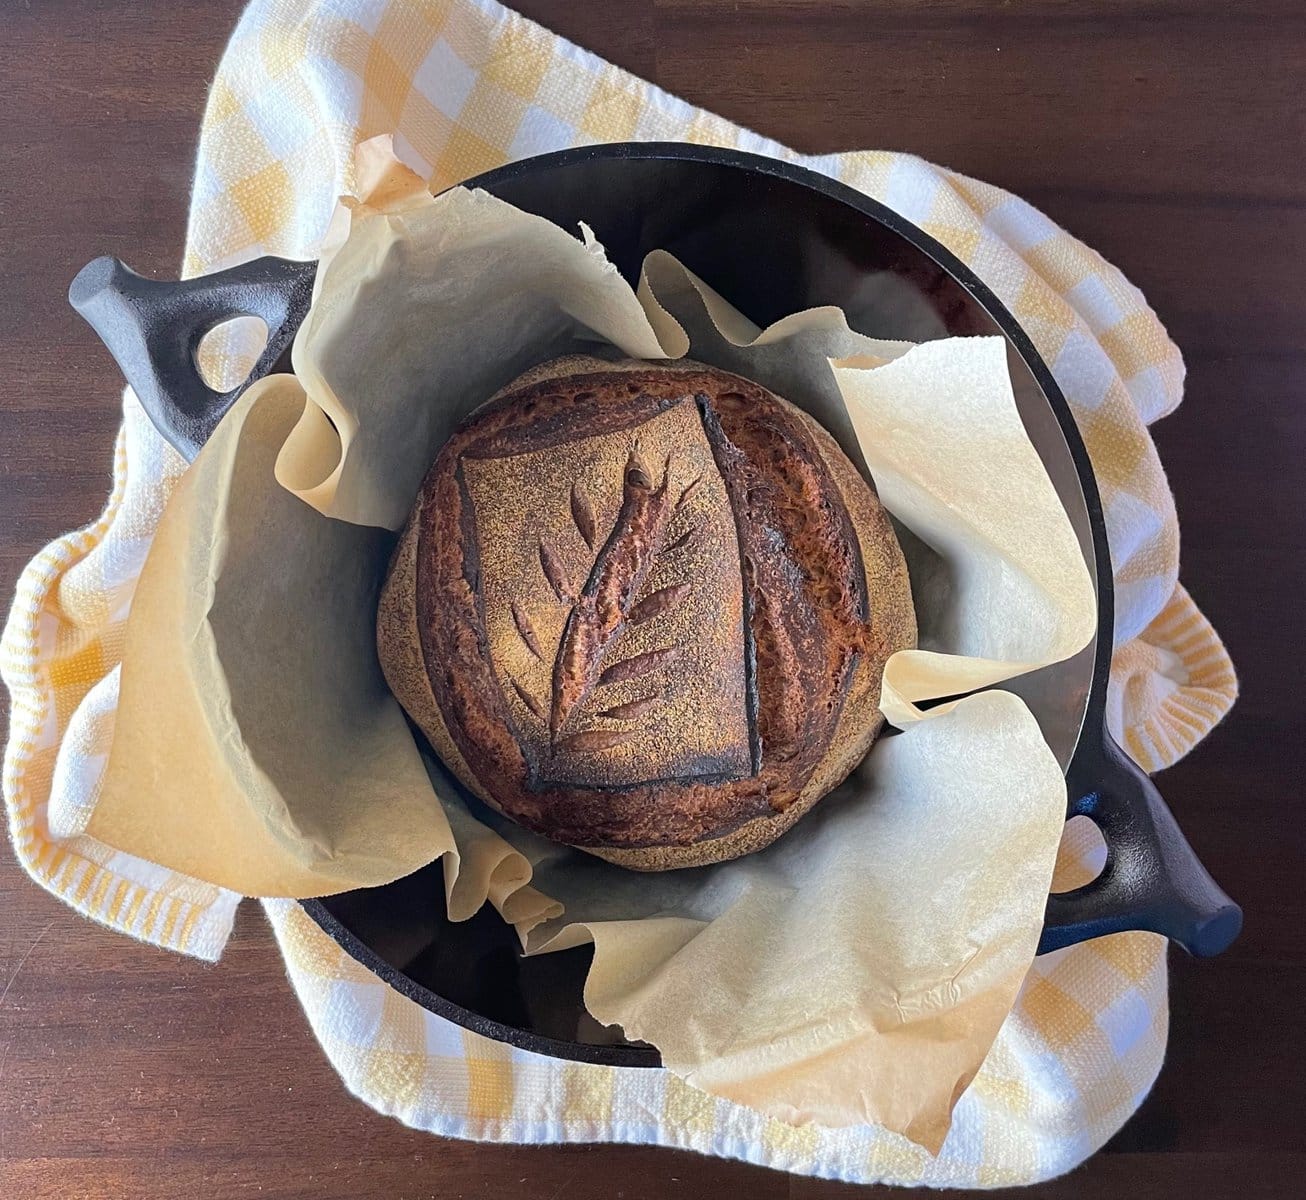
A Dutch oven is the key to this bread’s crisp crust and steamy bake. I use the 3.5-quart cast iron Dutch oven from Nest Homeware—it’s functional, beautiful, and just the right size for a loaf like this.
If you don’t have a Dutch oven, don’t panic. You can bake this on a preheated pizza stone with a pan of boiling water on the oven floor to mimic the steam effect.
A few optional tools make life easier:
- Kitchen scale – For accurate measurements (and fewer sad loaves).
- Proofing basket – Helps the dough hold its shape.
- Bench scraper – Keeps things tidy during shaping.
- Lame or sharp knife – For scoring dramatic, Instagram-worthy bread art.
- Serrated knife – For slicing, unless you prefer the rustic “tear and share” approach.
A Few Tips Before You Begin
- Feed your starter ahead of time. Give it at least one good feeding before baking day. It should be bubbly and active when you mix your dough.
- Time is flavor. No-knead sourdough takes longer to ferment, but that’s what builds the bread’s complex flavor and open crumb.
- Don’t stress about perfection. Each loaf teaches you something—about your starter, your flour, your kitchen temperature.
The Bottom Line
This 50% whole wheat no-knead sourdough is as wholesome as it is forgiving. Once you’ve baked it a few times, you’ll start to feel the dough’s rhythm—and maybe even find yourself planning your week around that final bake.
Bake it on a lazy weekend, tear it apart beside a pot of soup, or toast a few slices for breakfast with butter and jam. However you eat it, this loaf delivers all the earthy flavor of whole wheat with the chewy, crusty magic of classic sourdough—no kneading required.
Suggested Pairings:
Here are some recipes that will work great with this loaf:
50% Whole Wheat No-Knead Sourdough Bread
Ingredients
Standard Sized Loaf
- 20 grams (1 tbsp plus 1 tsp) active sourdough starter
- 320 grams (1⅓ cup) water
- 195 grams (1¼ cup) whole wheat flour
- 189 grams (1⅓ cup) all-purpose or bread flour
- 9 grams (1½ tsp) fine salt
Smaller Sized Load
- 15 grams (1 tbsp) active sourdough starter
- 240 grams (1 cup) water
- 156 grams (1 cup) whole wheat flour
- 142 grams (1 cup) all-purpose or bread flour
- 6 grams (1 tsp) fine salt
Options
- rice flour or wheat bran for dusting proofing basket
Instructions
- In a small bowl whisk together starter and water until starter has dissolved and mixture is bubbly.

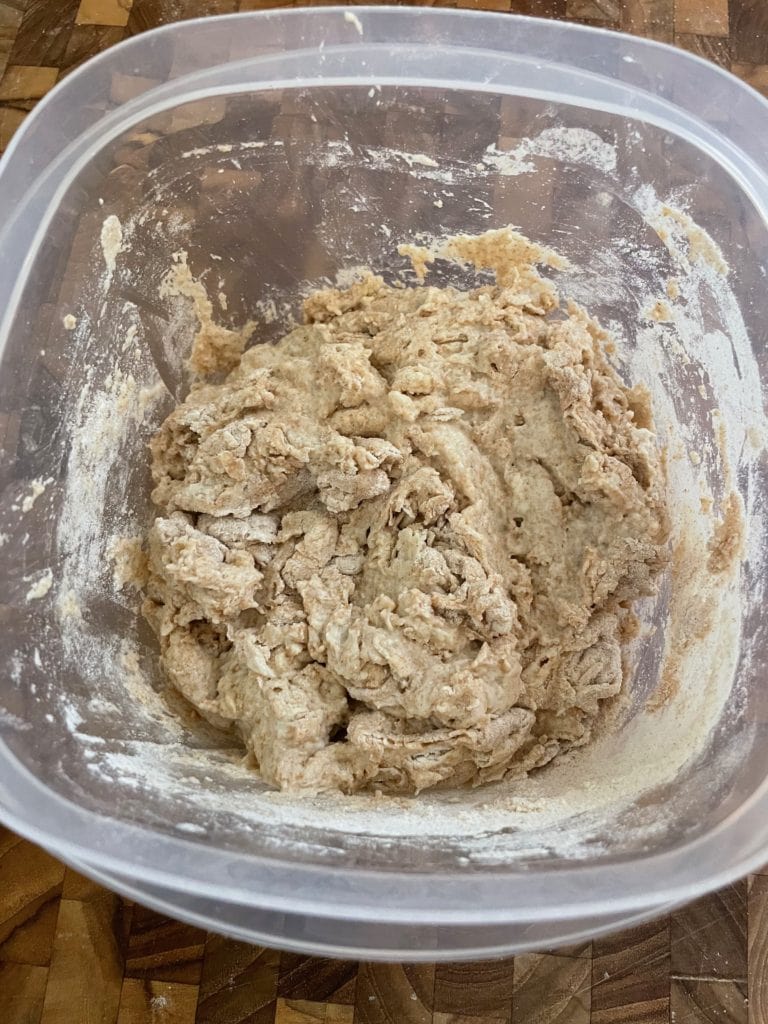
- In a large clear bowl or container whisk together flours and salt. Add dissolved starter to dry ingredients and mix quickly to form a shaggy dough. Avoid over-mixing and stop once no dry bits remain. Cover with a towel and let sit for 20–30 minutes.
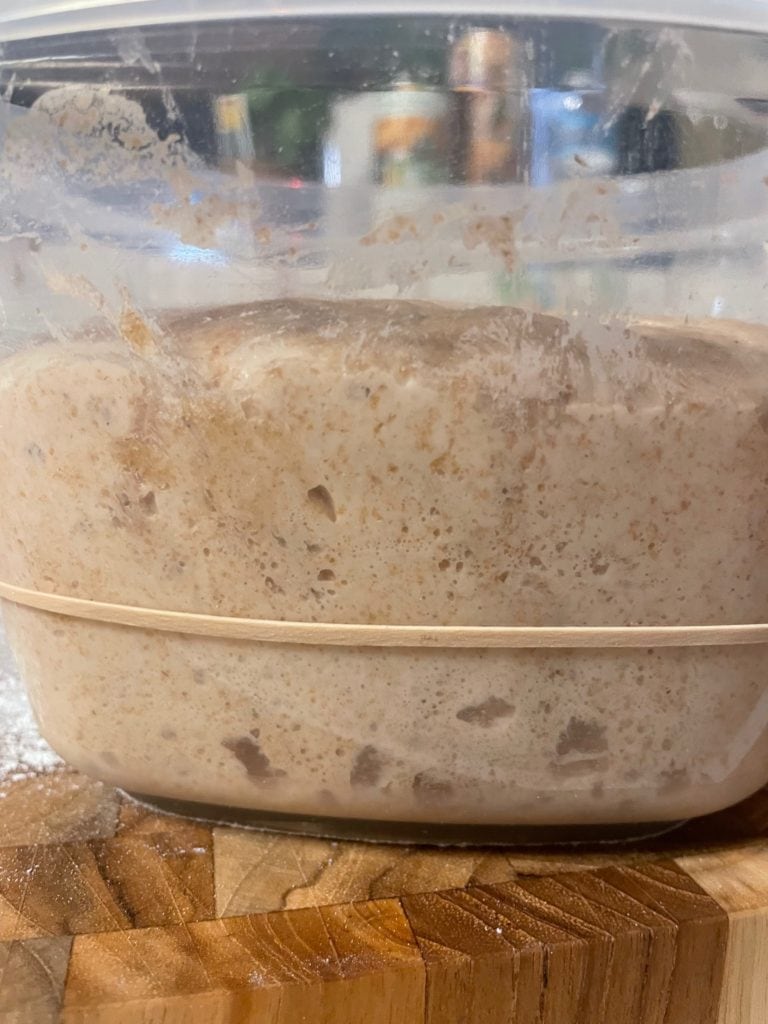
- Wet your hands and reach under the dough. Grab one side of the dough and gently stretch and fold it over the other side of the dough. Quarter turn your container and repeat until you have folded dough four times. The mixture should transform from a shaggy mass into a smoother, more cohesive dough. Mark the position of the top of the dough on the side of the container with a washable marker or rubber band. Cover with a towel.
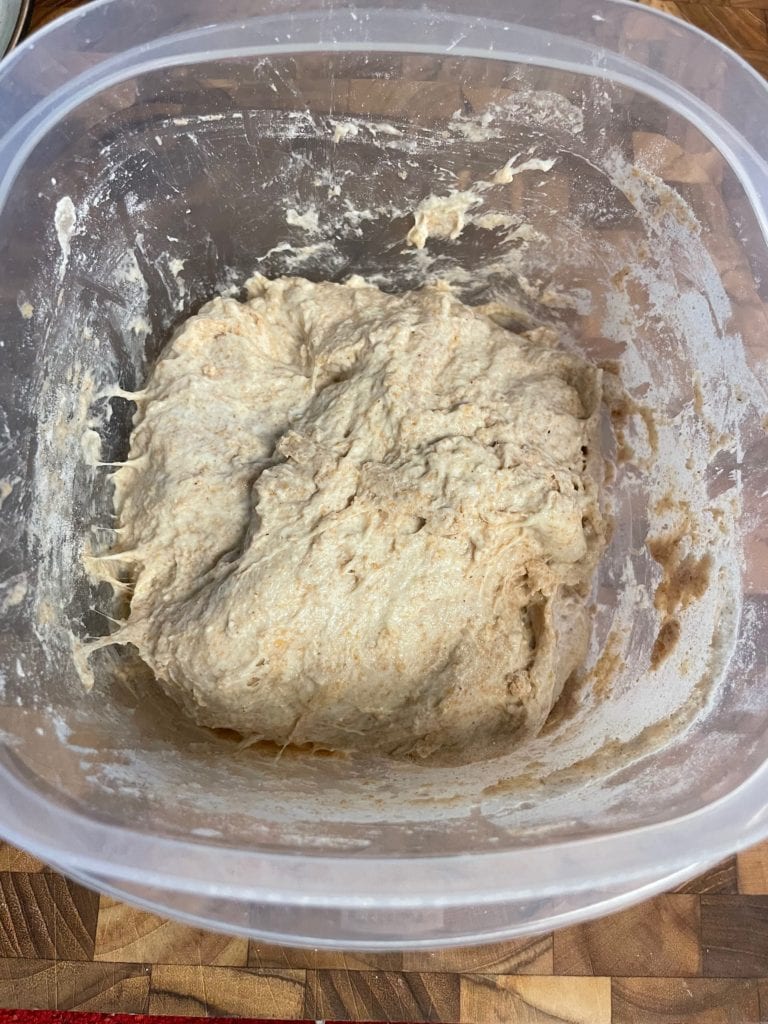
- Leave dough to rise at room temperature until it has increased in volume by about 50–100%. This can take around 6–12 hours depending on the ambient temperature and the strength of your starter. If room temperature is below 70°F (21°C) consider proofing in an empty oven with the light on (but leave yourself a note so you don’t accidentally heat the oven while it is in there).
- Fill a small bowl with water and use it to wet your hands. Release dough from the sides of the container and transfer to a lightly floured work surface. Gently stretch the dough into a rough square about 5×5-inches. Wet hands as needed if dough is sticking. Fold each corner of the square into the middle. Cover with a towel and allow to rest for 15–20 minutes.
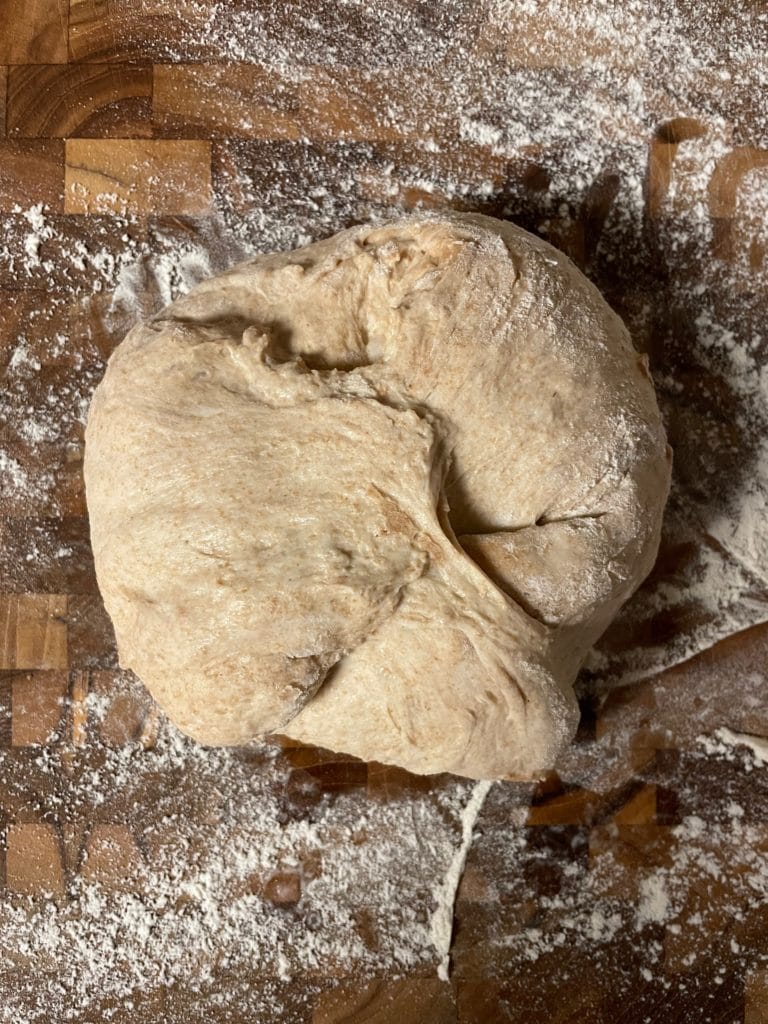
- Line a proofing basket or 8-to-10-inch bowl with a towel and dust with rice flour, wheat bran, or a heavy sprinkling of all-purpose or bread flour. Wet hands and again fold each corner of the dough into the middle. Repeat, folding the corners into the middle, as needed until dough is in a taut ball. Stop before dough starts tearing. Pinch seams closed.
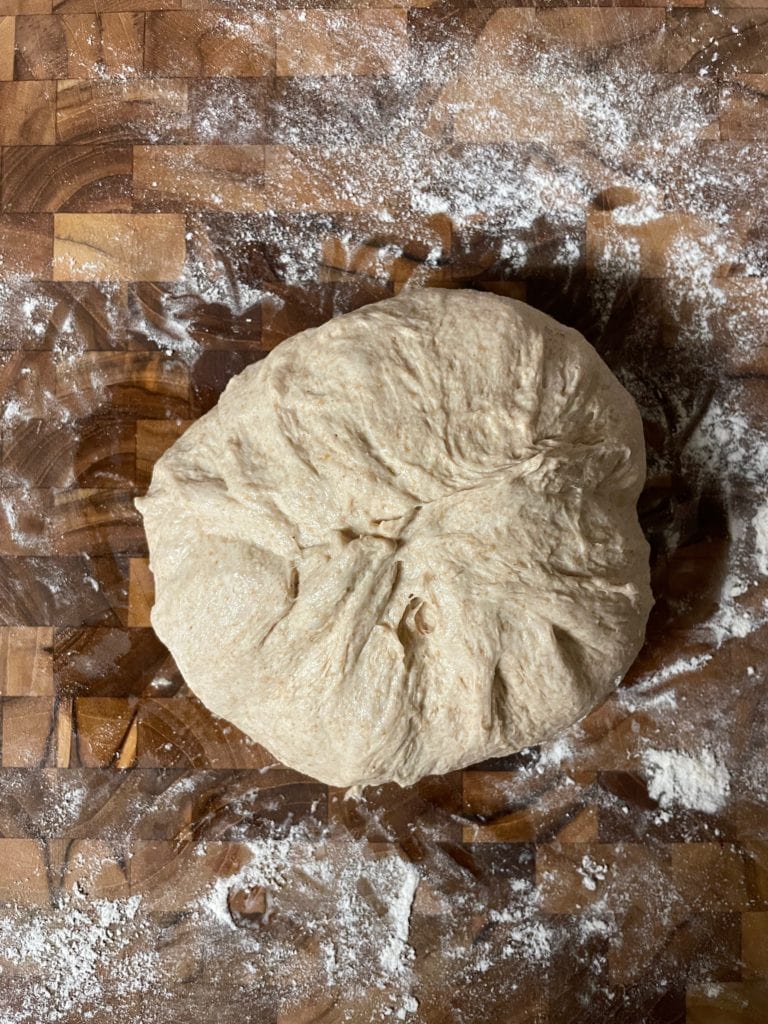
- Transfer dough to prepared basket or bowl seam-side-up. Dust the exposed side of dough with whatever you used to flour the basket. Cover with a towel. Transfer dough to the fridge and allow to proof for 12–24 hours (don’t anticipate the dough to noticeably grow when proofing in the fridge). Alternatively, you can proof at room temperature for about 2–4 hours, until dough has roughly doubled in volume. When done proofing a finger indent in the dough should spring back slowly.

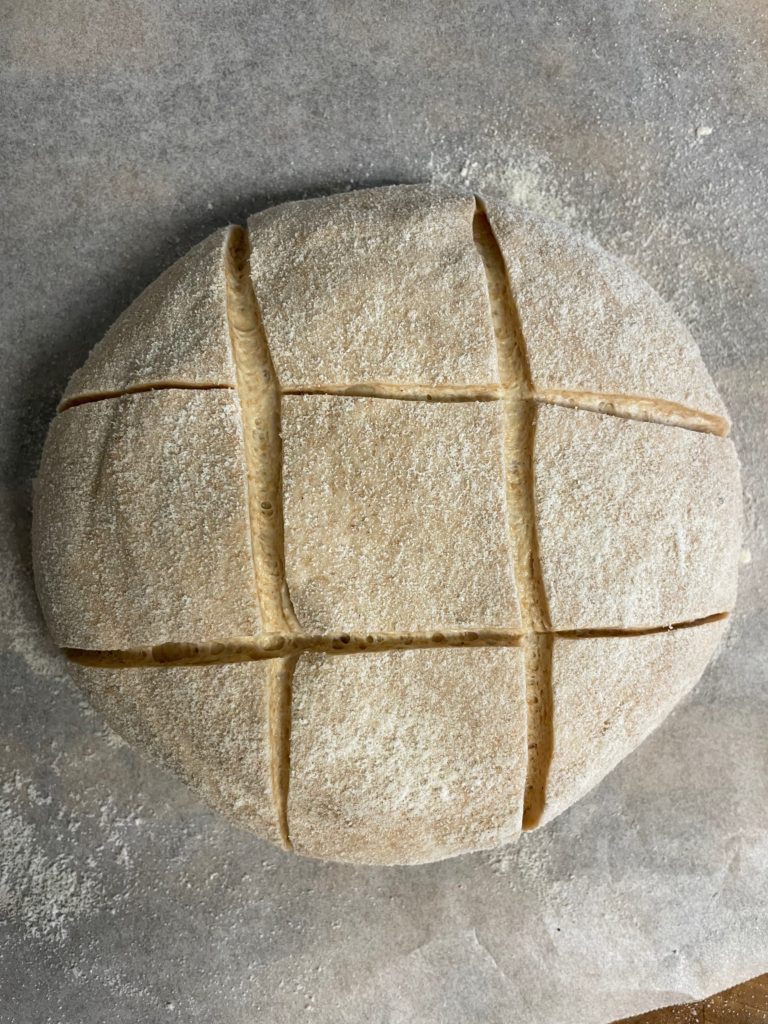
- An hour before you plan to bake place the pot and lid of a Dutch oven side-by-side on the middle rack of oven and preheat to 450°F (232°C). Once oven has preheated for about an hour prepare a square of parchment paper roughly 8×8-inches. Gently flip the dough onto parchment paper seem-side-down. Score the top of the loaf about ¼-inch deep with a serrated knife or razor blade. This can be a single slash, a cross, a square, or any pattern you like.
- Remove preheated pot and lid from the oven and carefully lower dough into the pot. Add an ice cube to the pot underneath parchment paper and cover with lid. Bake for 20 minutes then remove lid and bake for an additional 20-30 minutes (see recipe notes) or until loaf is deeply golden brown and sounds hollow when tapped on the bottom. Remove to a wire rack and cool completely—at least an hour—before cutting or tearing into your bread.
